

Monday, March 14, 2011
Tim Coffey entry for My Paper Pantry Contest
Instead of a 12x12 layout, minibook, or decorating a birdhouse or paper mache box, all which I'm tempted to STILL do with this beautiful paper, I wanted to 'quilt' a picture with this paper for my contest entry. I created a pattern and cut the paper as if you would be piecing a quilt, and glued it all down, sections at a time, including the canvas's outside edges, and then modpodged over it, and modpodged some of the cardboard Tim Holtz decorative chipboard pieces that matched the paper (the bee's and butterflys). I wanted to do MORE to it, but I realized that it would hide the paper piecing and the simplicity of the pattern was the beauty of the piece, so I withheld from adding more to it. I will put it up on my wall infront of my computer downstairs, where my husband and I play video games together. And yes, I'm dreaming of spring and flowers and my flower and veggie gardens. Only a few months away and I'll be in the mud and sun.
Wednesday, February 23, 2011
My Paper Pantry Challenge and contest

I gathered my courage and took the plunge and joined to challenges on My Paper Pantry websight. Both are for judging and prizes, (woo hoo), nothing like diving in headlong and deep when starting something new....(I always say).
My first challenge was a 12 x 12 layout for scrapbooking. There is a sketch posted that is supposed to help you 'get started' and then you let your creativity take over and make it your own. Well of course, my creativity is always on hyper overdrive. So I could barely bring myself to stop.

This is the layout, using two of my favorite photographs from my daughters wedding that I took before the ceremony at the law quad in Ann Arbor. The main focal point is the photograph of the the girl's shoes, they were allowed to wear different shoes but in the color black. I printed this photograph in black and white and went with their wedding colors of red, black and white with the paper and embellishments.
The journaling spot is a checklist for the bride and the things she needed to bring to the wedding.

This is a close up of the main focal point picture.

The second picture is a picture of the female side of the wedding party. I didn't have room in the design to add the picture as is, so instead I made it a tag and put it behind the title that is on the top left corner.


I think I will be either framing this in the future (without glass), or buying a canvas and painting it black and glueing it to the canvas for hanging on the wall, since the bride has three cats and if its put on a table or shelf, the cats will eat it.
Thursday, February 17, 2011
The new house is coming along nicely!
As you can see, the outside deck lattice is painted, my front doors are on their hinges, and the outside walls are now in place. It is as tedious as a new house, you just can't live in it.


Hydroponics
Growing lettuce from the grocery store in my back window. I am supposed to be able to keep it alive this way. We shall see. This is my favorite lettuce, Bib.

Thursday, February 10, 2011
Aging some cardboard cutouts


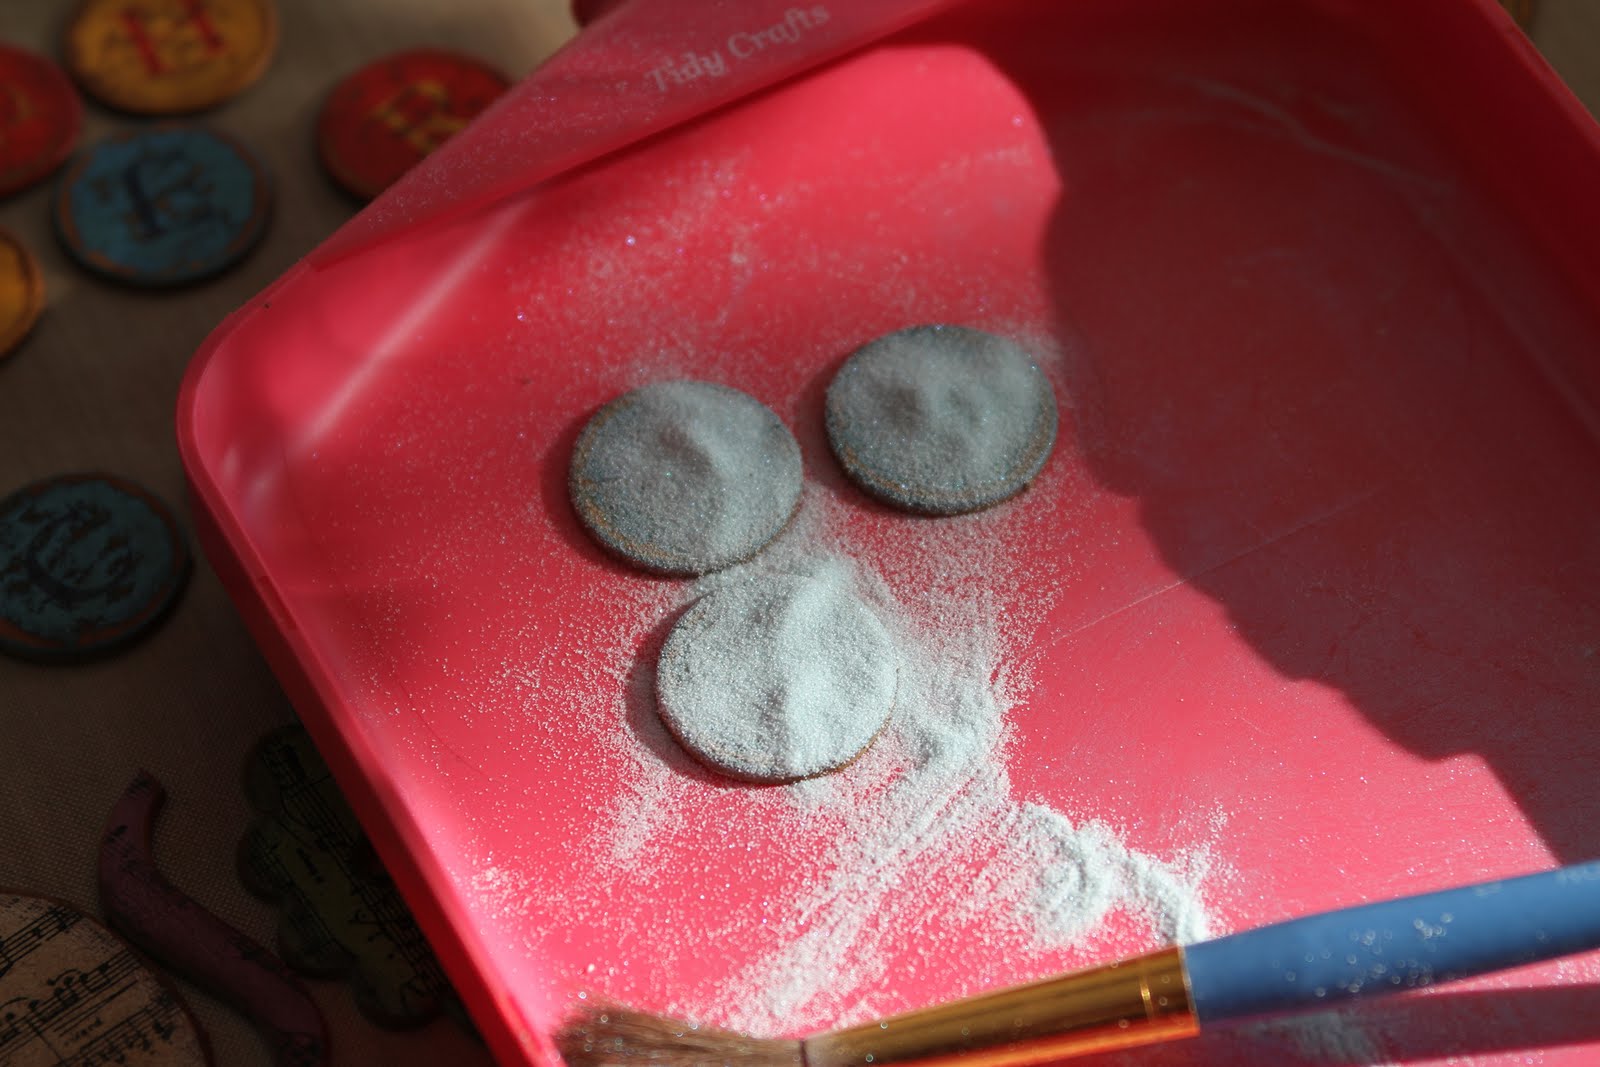
I have a lot of cardboard cutouts, and the colors are too vibrant and basic for most of the pages I create and most of my papers. Except for red, white and blue layouts which I don't use often, my colors are usually warmer with less saturation. Therefore, what do I do with about 200 pages of cardboard punchouts, both letters and shapes?
The first thing I tried was was stamping them. The problem with simply stamping over them, was the cardboard has a shiny surface, and even the staze on ink was not sticking well. So after I stamped each of them with a musical notes background stamp, I decided to emboss them. This sealed the ink over the shiny cardboard, desaturated the colors and made it possible to age the cardboard with distress inks if needed.
With the small round letter cardboard cutouts, I sanded the edges, to remove the nubs, and sanded some of the shiney cardboard and print off the top. Then I distressed with walnut ink to age.
This improved these elements greatly, and I can now use them for layouts and mini's. No more bright, saturated shiny cardboard.


Monday, January 24, 2011
New Software, Portrait Professional, example below
I just bought this software, and I'm loving it. I have refinished a snapshot I took of my dmil at Christmas, she was pretty wore out for a days of fixing food and shopping. The first photo shows the wear and tear on her face, the second photo I fixed in the software, what a difference!


Homemade Laundry soap, saves a ton of money, lasts for months!
Directions for this soap are below. I found this soap recipe on the internet, and have used it for a couple of years now. I have perfected into the way I like it. I use Arm and Hammer washing soda, Borax, 1 bar of Ivory hand soap and water.
 You will need some supplies that you only have to buy once and they should last forever. I bought a dedicated pan to cook the soap in, I don't clean it, I just put it down in my basement between batches with a dedicated platic spoon. I also use kitty litter tubs to store the soap in. They are strong and cost me nothing, since I have a cat!
 I chop my Ivory up into pieces, then put it into my small food processor and chop it up into tiny pieces.
 While you are doing this, have your cooking pan filled with about 2 gallons of water, and get the water into a rolling boil before you add your tiny pebbles of hand soap to it.
 Add your bar soap into the rolling boiling water, and you should see your soap dissolve into the water while stirring your pot within a few minutes. If you add the powders before the bar soap, you will find it takes a LOT longer for the bar soap to suspend into the water, because it's competing for space with the dissolved powder soap. So for sure, add your bar soap into the water first.
 This is not a project you can walk away from, it will boil over pretty quickly, just ask the noobsauce about that!!!
 Never let a learning experience go to waste, since I boiled over the water while I turned my back to wash a dish....I now can clean my stovetop while my ingredients boil.
 Once your bar soap has dissolved into your water, add 1 cup each of borax and washing soda. Boil these three ingredients together for about 5 minutes while stirring occasionally. Have a magazine ready, and don't turn your back on this....
 Fill up a container 3/4's full with water, then add your pot of soap into it, careful not to splash yourself, and then stir the ingredients together to suspend all the soap into the water. Fill the rest of the container with water.
 This is the bottom of a container not quite used up, the soap is in the bottom and I will just pour a pot of soap ontop of this and stir it till everything is dissolved together and then add water.
 This is what the soap resembles after it cools, a slippery hot mess that resembles a translucent lard but holds together in your hand.

 My company and audience, Tilwyn, Mia and Bailey, I always have to wave them out of my kitchen because they think they are missing something, no scraps here puppies!!!
 My product! Waiting for my husband to take it down to the basement. It will cool overnight and be a beautiful white gel laundry soap tomarrow. I use this soap in warm water due to the fact my water is pretty hard and I hate using cold water. This should last my family of 3 adults + 3 adult children who come to do THEIR laundry at my house every couple of weeks, about 4 months. It cost me pennies to make!
 Now back to the craft table!!!


Subscribe to:
Posts (Atom)